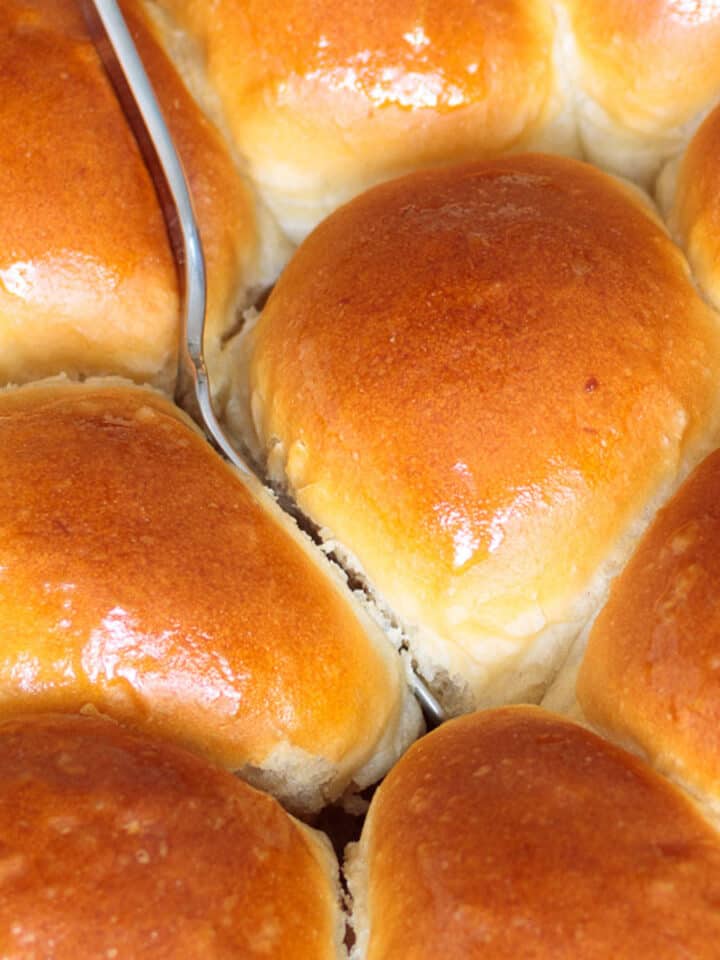
This easy, no-knead, 2-in-1 ciabatta bread recipe makes crusty, homemade brown and serve rolls and large squeezable sandwich rolls with minimal effort.
Use it to make bake-and-freeze dinner rolls to brown and serve later. They go straight from the freezer to a toaster oven or conventional oven and have a crackly crust in 10 minutes. When you split them open, the steamy insides filled with airy nooks and crannies are just begging for the best Homemade Vegan Butter.

They make a nice change at Thanksgiving from my equally delicious, fluffy Pull-Apart Yeast Rolls. Brown and serve rolls save oven space and give you extra time to make fresh Florida Cranberry Sauce.
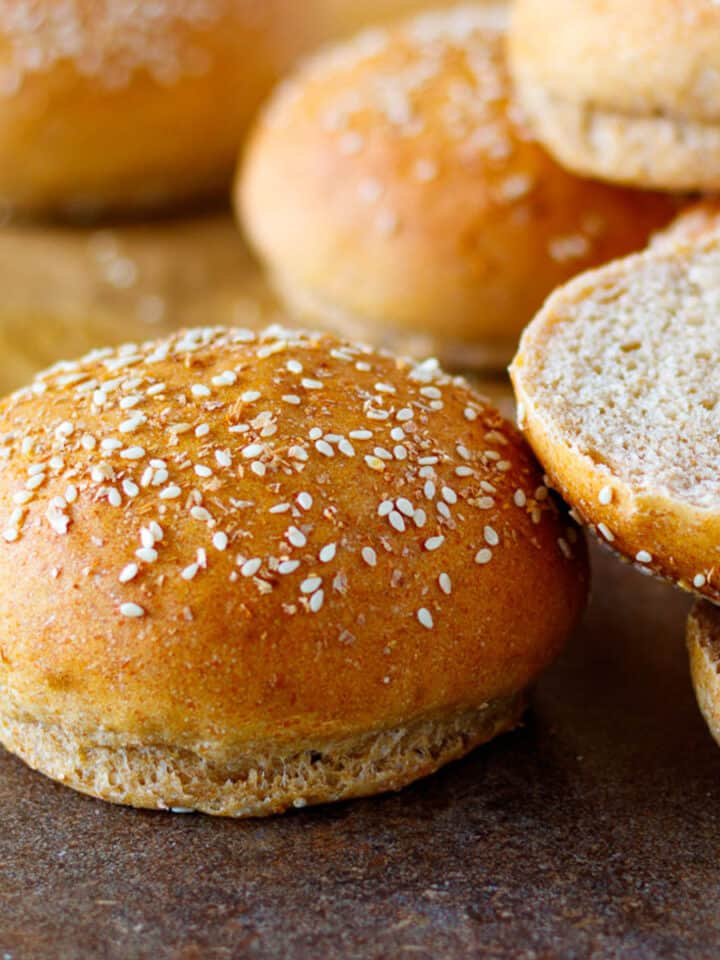
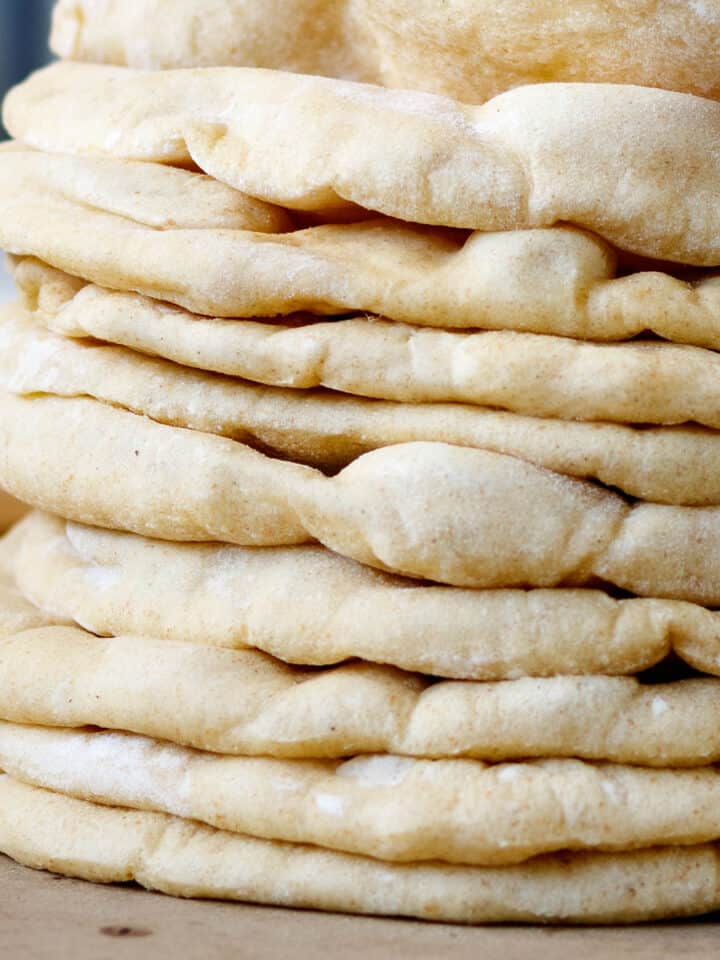
Any time of year, the larger ciabatta buns are perfect for hearty sandwiches. These generous, artisan-style rolls soak up juicy fillings without getting soggy and bake up springy enough to squish when you grasp them with both hands. That's a definite plus when piling high the BEST Vegan Falafel Sandwich and Sauce!

Jump to:
⭐ Why it works
- Artisan bread for beginners.
- Easy overnight no-knead recipe.
- 4 ingredients.
- Freezer-friendly.
- Brown and serve straight from the freezer.
- Makes 12 crusty brown and serve buns or 8 squeezable sandwich rolls.
🥣 Ingredients

- Organic all-purpose flour - makes high-rising, light rolls with a thin crust. I don't recommend bread flour which makes the rolls a little tougher.
- Active dry yeast - I use Red Star Active Dry Yeast. Any brand is fine as long as the yeast is fresh and stored well. Be sure to check your expiration date.
🔪 Steps
You can make the dough for these awesome ciabatta buns in just a couple of minutes. All you need to do is stir yeast, flour, and water together with a spoon. No mixer or kneading is required.

Note - Measuring cups and flour vary by brand. Thus, a scale for measuring both water and flour by weight will give you the best results. This recipe assumes 135 grams for each cup of flour and 236 grams for each cup of water.
- Dissolve yeast in water.
- Measure flour on a scale.
- Alternatively, use the spoon and level method to measure flour.
- Stir flour and salt into the water with yeast to make a rough dough.
🍞 Rise dough overnight
It's worth mentioning this recipe is a true no-knead recipe from start to finish. It's so easy it almost seems like cheating!
You can sleep all night while this friendly ciabatta dough works on its own to develop its flavor and stretchy crumb. Then, bake it at your convenience the next morning.
Alternatively, start the ciabatta dough early in the morning and bake this easy, hot roll recipe for dinner. Simply bake the bread 5 minutes longer, and it won't need the brown and serve step.

🫓 How do you shape rolls?
Just slide your soft dough onto a counter well dusted with flour, give it a quick and gently fold, and it's ready to divide. Below are instructions to make a dozen crusty brown and serve rolls or 8 large ciabatta sandwich buns.

- Transfer dough from rising container to counter dusted liberally with flour.
- Fold the longest side of dough over itself east to west.
- Fold again from the opposite direction, south to north.
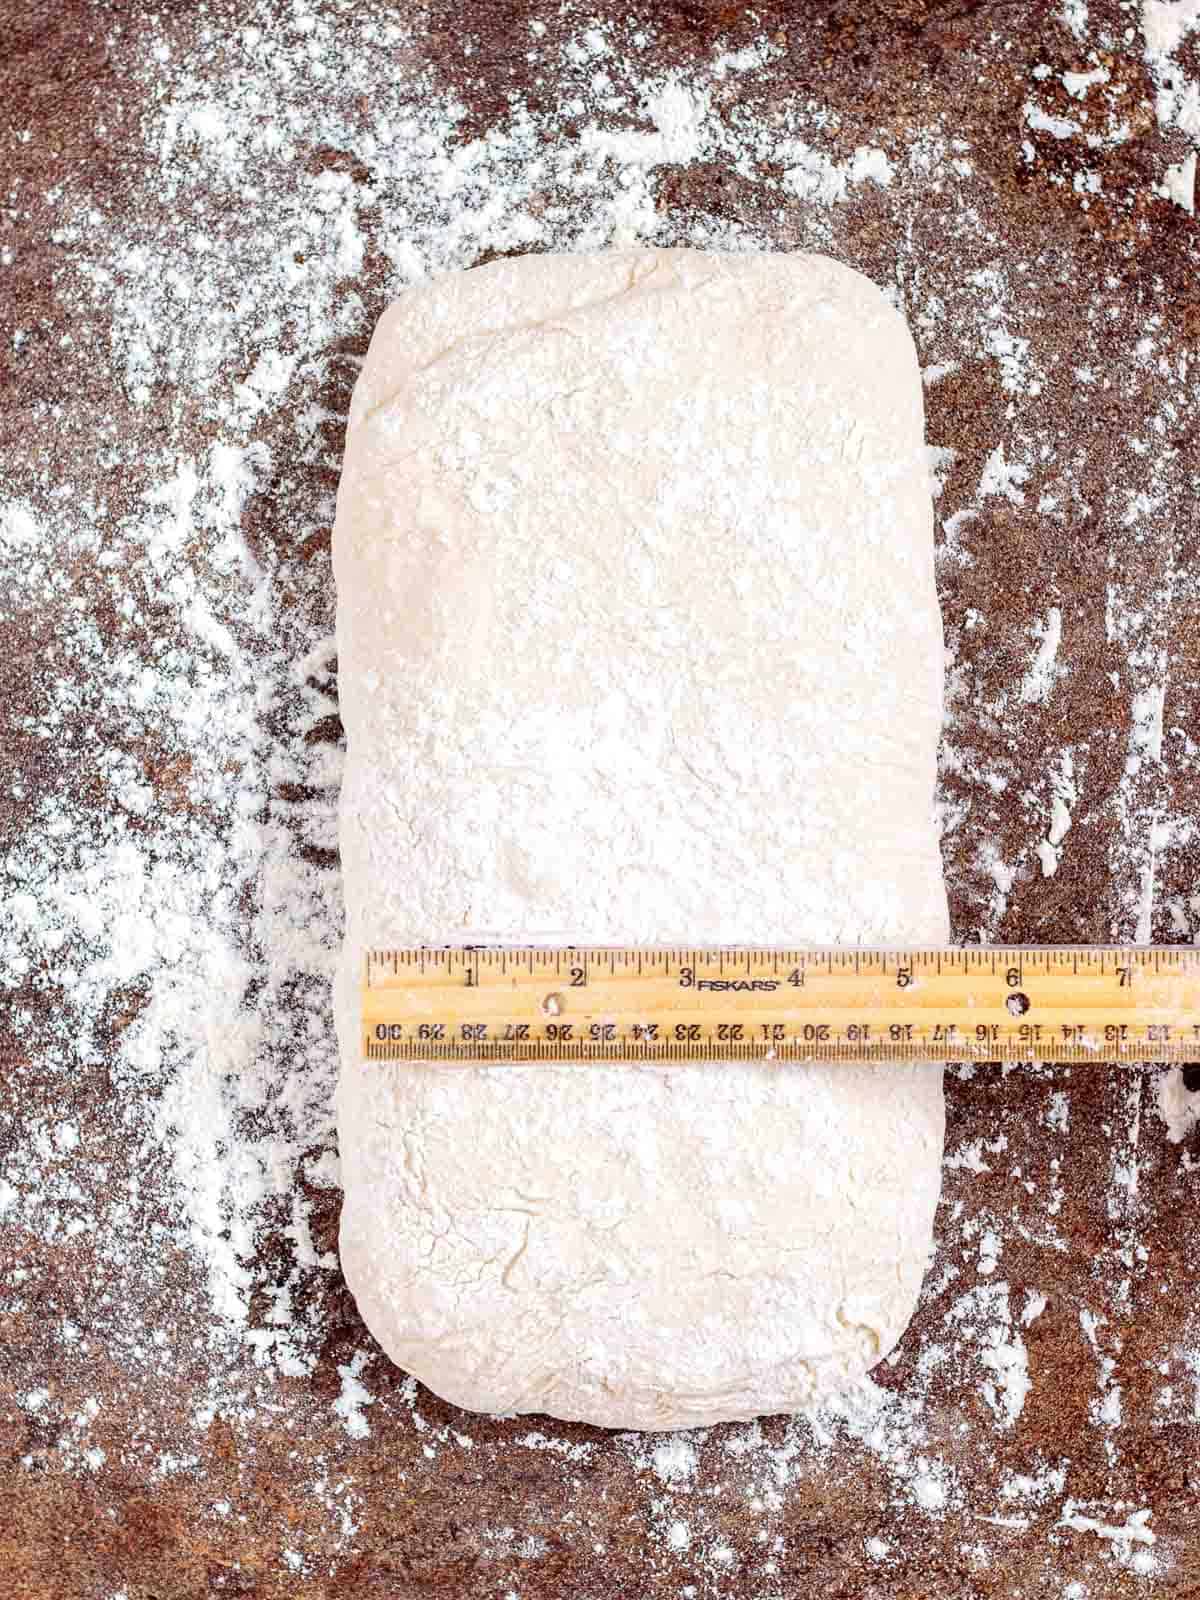
- Dust with flour, flip and gently coax into a rectangle 5 by 10 inches.
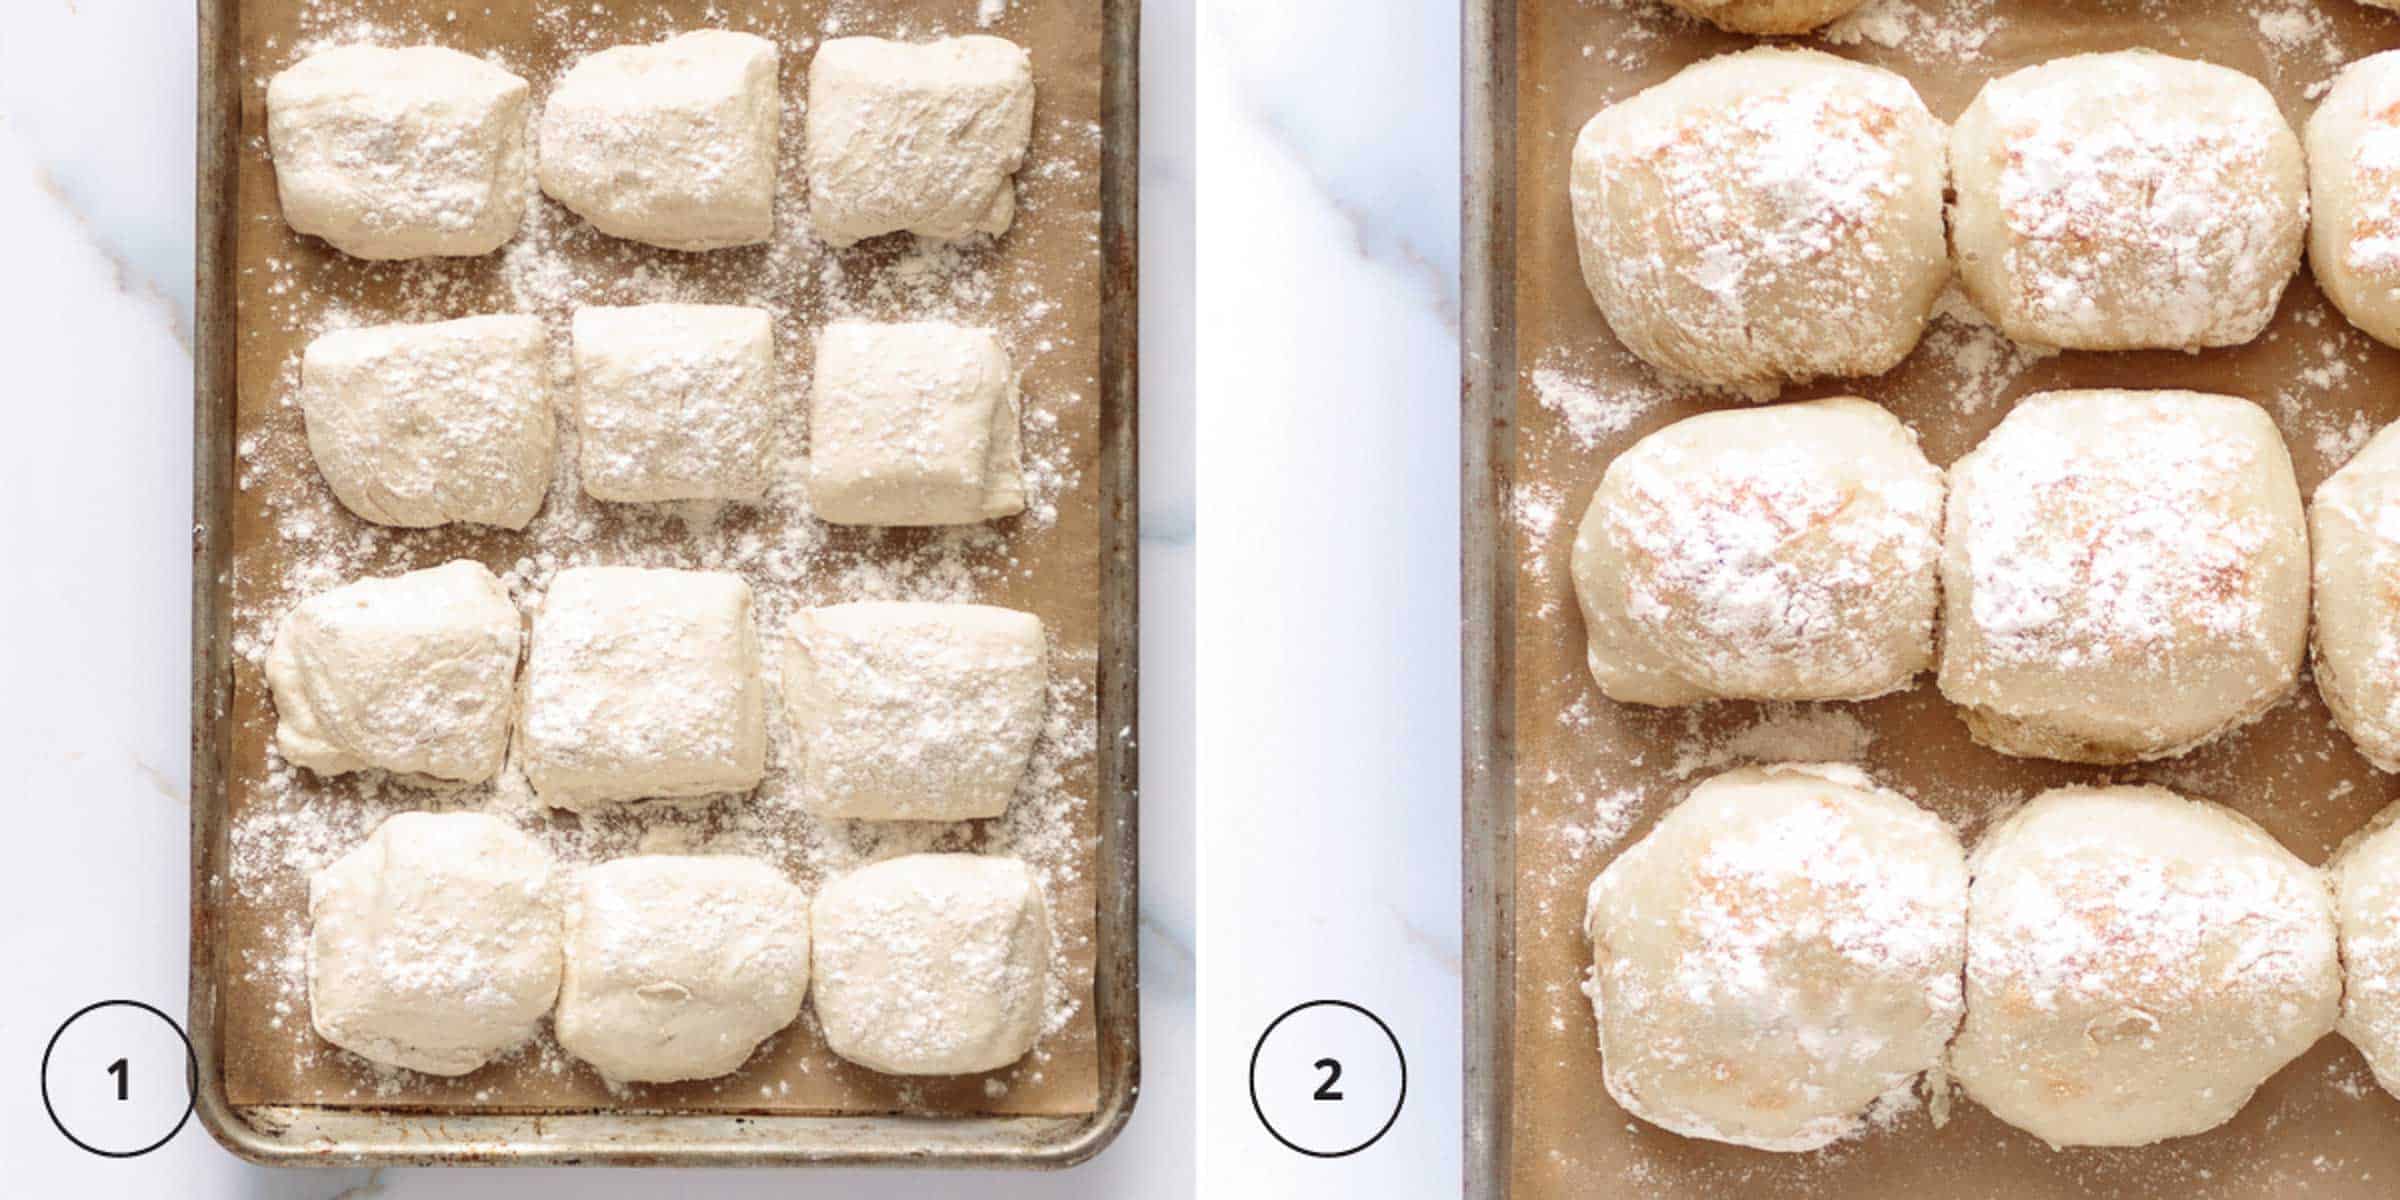
- Small buns for brown and serve - Divide the dough in half crosswise. Divide the two sections in half crosswise again. Divide the four sections in half once more. Finish by cutting each section into three equal pieces to make 12 brown and serve rolls.
- Large rolls for sandwiches - Divide the dough in half crosswise. Divide the two sections in half crosswise again. Finish by dividing the whole section of dough lengthwise to end with 8 large ciabatta buns.
⏲️ First bake
- Rise the shaped rolls until puffy but not sagging.
- Bake bread but don't allow it to brown more than a few golden specks here and there.
🪄 Top Tip

Place unbaked rolls on a parchment-lined cookie sheet to rise. Use a second cookie sheet turned upside down for a lid. No struggling with sticky plastic wrap.
❄️ Freeze
This recipe freezes beautifully and makes it so easy to enjoy hot bread any time of day. I love the way the small brown and serve ciabatta buns go directly from the freezer to the oven and don't need to be thawed before baking.

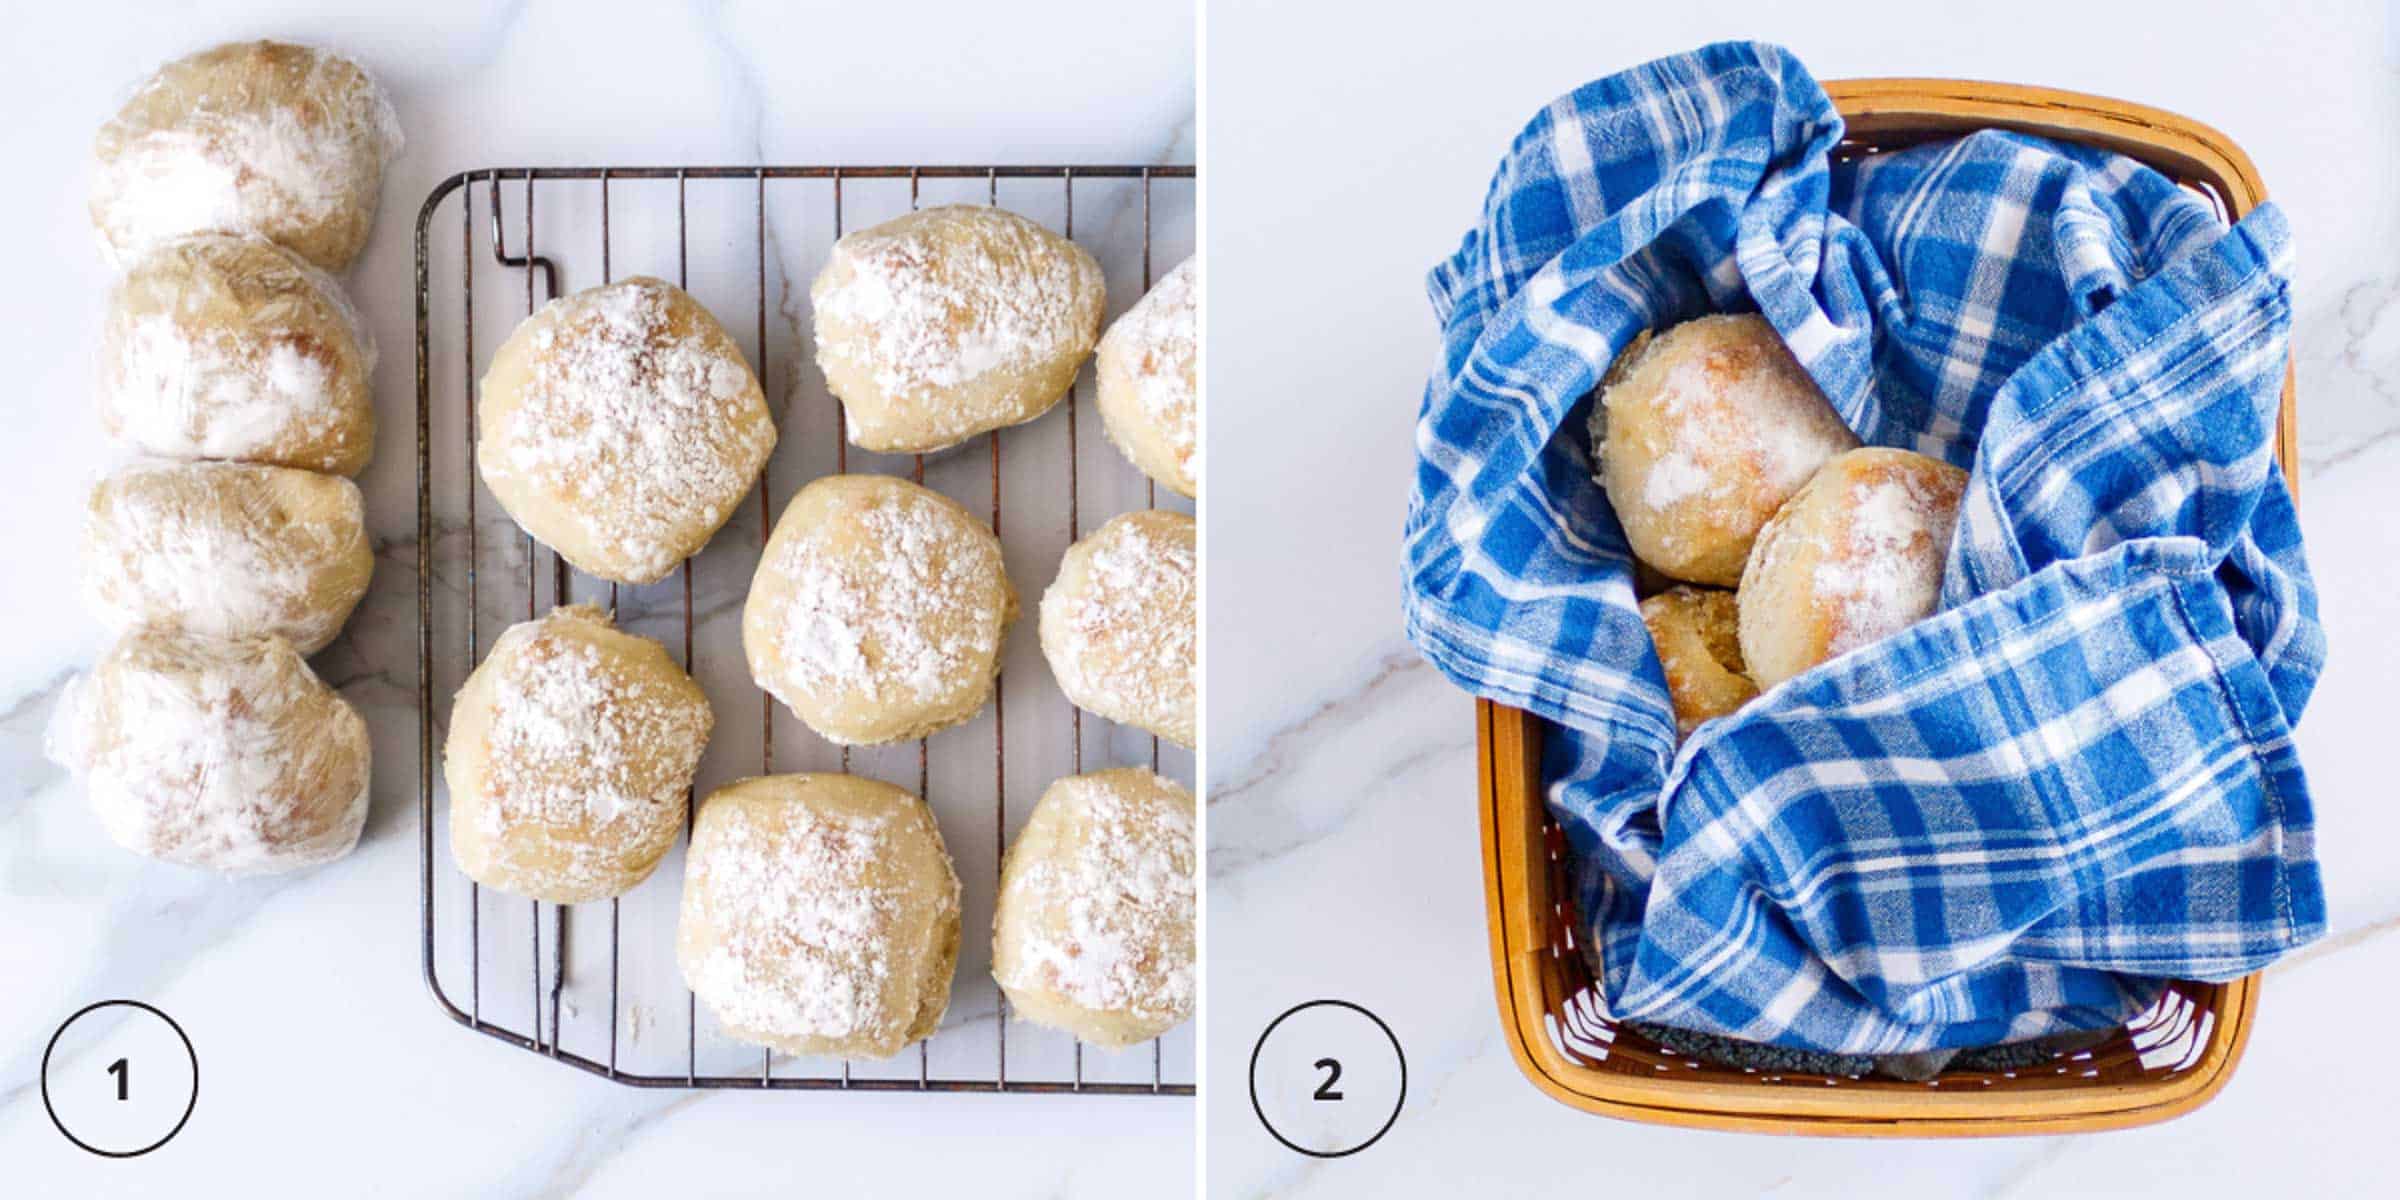
Wrap the buns that you will use later for heat and serve rolls as soon as they cool to room temperature. I like to use a double layer of compostable cling wrap.
Freeze right away and store frozen brown and serve rolls for up to two months.
♨️ Brown and serve
- Unwrap frozen bread and place it directly on the middle rack of a toaster oven or conventional oven. Bake for 10 minutes or until fully golden and crusty.
- Baked rolls will stay warm for up to 30 minutes if you tuck several together in a basket lined with a tea towel and cover them well.
You can bake your brown and serve rolls in either a toaster oven or a conventional oven. Whichever you choose, preheat the oven to 450 degrees before baking bread.
We love these crusty rolls for breakfast! They are heavenly with their crunchy exterior and fluffy, steamy insides filled with Strawberry Roselle or homemade Guava Jam.
🥪 Sandwich rolls

We all know bread can make or break a sandwich. Well, you can have fresh bakery-style bread with this recipe even if you are a beginner. It's so easy and rewarding for the time spent.
To make large ciabatta sandwich rolls, simply leave them in the oven for an extra 5 minutes and skip the brown and serve step.
They have a light golden crust and a moist, chewy interior full of air pockets. Cover them with a tea towel while they cool, and the thin crust will soften.
🍽 Serve

- Brown and serve rolls - You can bake crusty rolls as needed one at a time in a toaster oven and serve them individually on the fly. Or bake several to serve a group. Family-style rolls stay warm when wrapped in a tea towel and tucked into a basket or serving dish.
- Large ciabatta buns - Cool freshly baked sandwich rolls to room temperature and store them in an air-tight bag. When you're ready to eat them, slice them in half with a large serrated knife. They are best eaten in one to two days.
👩🏻🍳 Expert tips
- Measure flour and water carefully, ideally with a scale. The dough should be very moist.
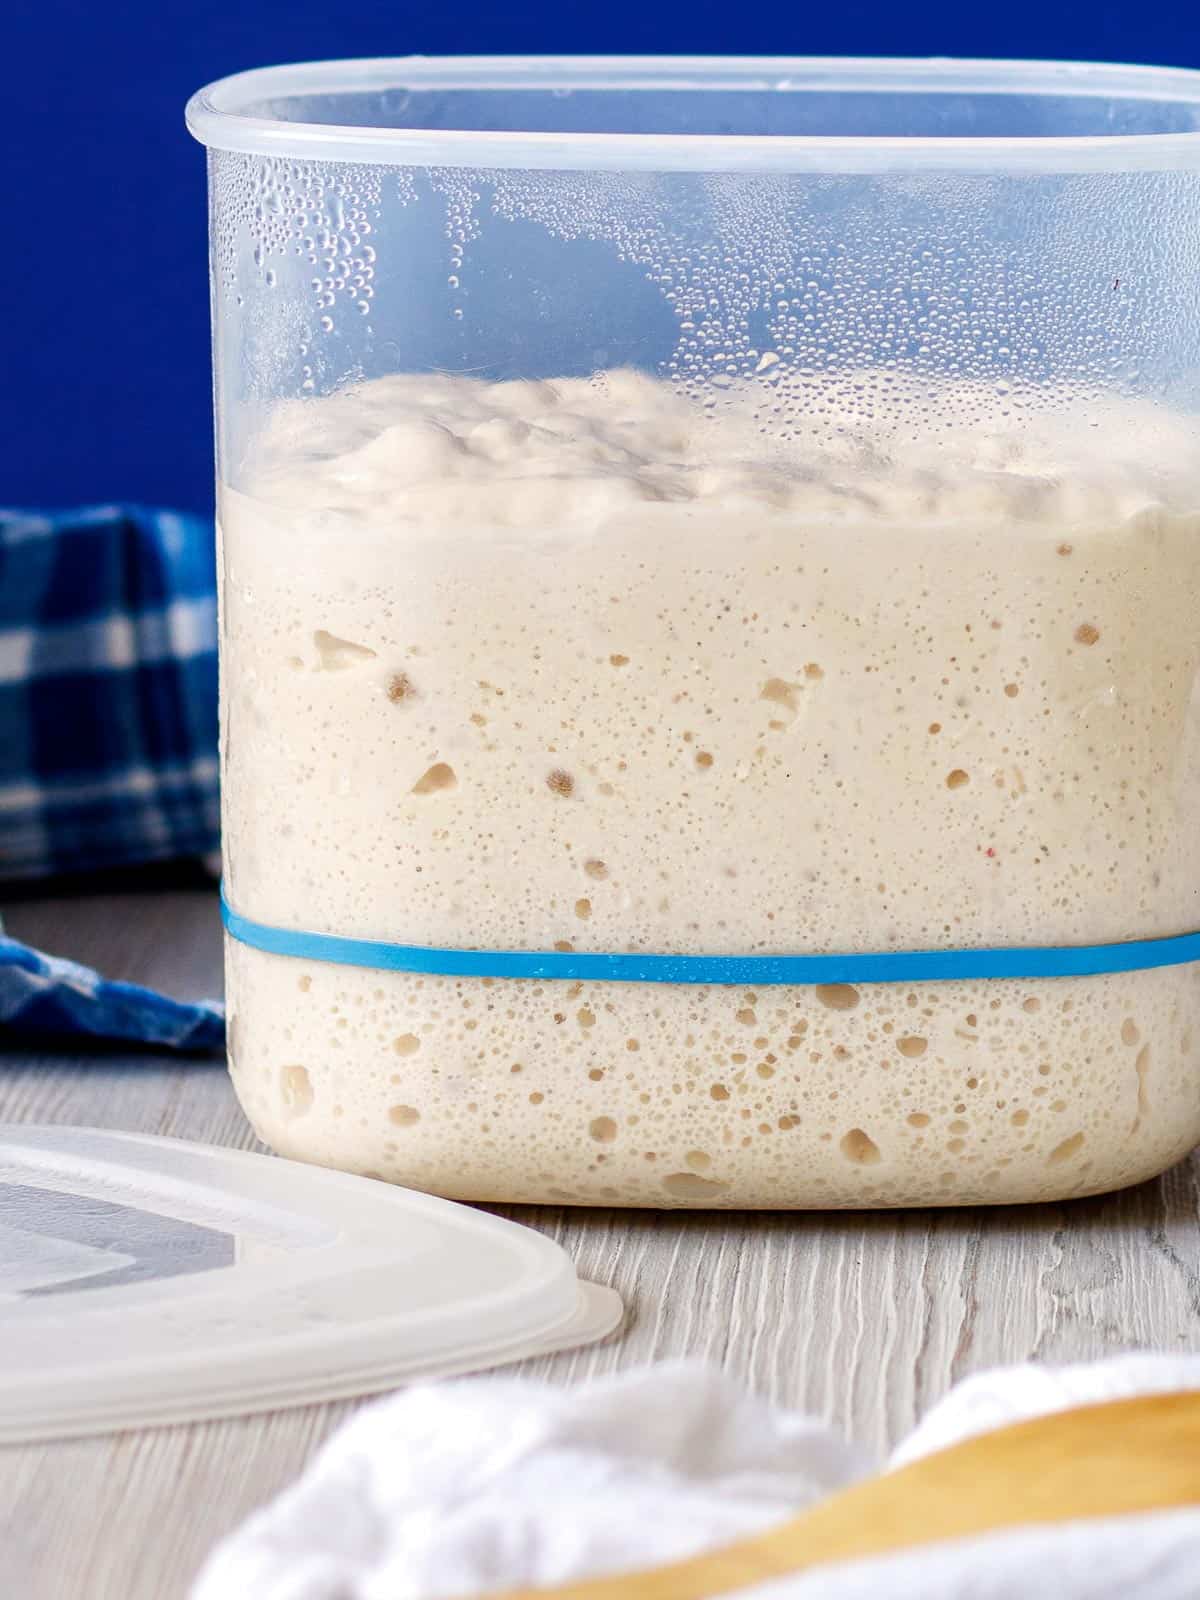
- Rise dough in a square container. That makes it easier to shape and cut squares of dough for brown and serve rolls, minimizes handling, and keeps air pockets intact.
- Cover the rising bucket securely and rise the dough at room temperature for about 30 minutes. It should rise 25%, not more. Then refrigerate for 12 hours.
- Dust your work surface generously with flour and make sure the bottoms of the buns are well-floured before transferring to a baking sheet.
- Line the baking sheet with parchment paper.
- Cover buns while they rise with a fitted cookie sheet turned upside down. If you don't have a matching cookie sheet for a lid while rising dough, dust rolls with extra flour and cover with a large, thin, tight-weave tea towel or cloth.
- Preheat your oven or toaster oven before baking rolls, whether it's the first bake or brown and serve step.
- Brown and serve rolls from the freezer can be baked without thawing. Place them directly on the center rack of a preheated toaster or conventional oven and bake them for 10 minutes or until golden and crisp on the outside.
- Large ciabatta buns - freeze well just like brown and serve buns. They can also be heated straight from the freezer without thawing. Place one at a time in a plastic bag and heat in a microwave for 60 seconds. They'll come out soft, chewy, and easy to slice for sandwiches.
💭 FAQ
You can use whole wheat flour, but the bread won't rise as high, and your rolls will be heavier. You might try using 50% whole wheat flour and adding a touch more water.
The easiest way to divide these rolls is to use a large dough scraper or a large, flat-edged knife. Use plenty of flour on your work surface and hands. Rub the dough scraper or knife with flour and sprinkle a thin trail of flour along the cut line. Press the dough scraper firmly into the dough and push one section of the dough away from the other before lifting the dough scraper. A floured spatula is also helpful for transferring the rolls to a baking sheet.
🥖 More no-knead bread recipes

Enjoyed this post? Leave a comment, rate ⭐⭐⭐⭐⭐ it, and follow @poppyswildkitchen on Instagram. Aloha!
📖 Recipe

Easy Brown and Serve Rolls - Ciabatta Buns
Ingredients
- 472 grams water = 2 cups
- 1 teaspoon active dry yeast
- 540 grams organic all-purpose flour = 4 cups
- 1 ¾ tsp. sea salt
Instructions
Mix Dough
- Pour water into a large bowl. Sprinkle yeast over the top. Let yeast sit for 5 minutes and whisk to dissolve.
- Add flour and salt to yeast water. Mix with a heavy wooden spoon until the dough is uniform. The dough will be very sticky and won't hold its shape.
- Lightly grease a rising container that allows for triple expansion. Cover tightly with a lid. A transparent square rising bucket is perfect.
Brief rest at room temperature
- Let dough rest covered at room temperature for 30 minutes. Watch to ensure it doesn't sit longer than it takes for the dough to rise 25 percent. You just want a little jump start for the yeast.
Rise in refrigerator 12 hours
- Place dough with its covered container in the refrigerator for 12 hours or until the dough has tripled in height and shows obvious air pockets.
Preheat Oven and Prepare Baking Sheet
- Preheat oven to 425 degrees and center baking rack.
- Line a 13 x 18-inch cookie sheet that has one-inch high sides with parchment paper.
Divide Rolls
- Generously flour a smooth work surface. Tip the risen dough out of the container with floured hands or a spatula. Let it fall lightly, and keep as many air bubbles in the dough as possible while shaping.
- Transfer dough from the rising container to a counter dusted liberally with flour. Fold the longest side of the dough over itself, east to west. Fold again from the opposite direction, south to north. Dust with flour, flip and gently coax into a rectangle 5 by 10 inches.
- Small buns for brown and serve - Divide the dough in half crosswise. Divide the two sections in half crosswise again. Divide the four sections in half lengthwise. Finish by cutting each section into three equal pieces to make 12 brown and serve rolls.
- Large rolls for sandwiches - Divide the dough in half crosswise. Divide the two sections in half crosswise again. Finish by dividing the dough lengthwise to end with 8 large ciabatta buns.
Rise 15-20 minutes
- Arrange rolls on the cookie sheet and dust tops liberally with flour. Cover with an identical-sized cookie sheet to make a lid. Let rise at room temperature for 15 - 20 minutes until puffy, and the sides of a few rolls are almost touching.
Prebake brown and serve rolls
- Place rolls in preheated oven.
- Bake rolls for 15 minutes or until firm with just a few golden spots. the dough should not be raw. At the same time, don't let it form a hard crust.
Bake ciabatta sandwich buns
- Bake rolls for 20 minutes or until light golden with a thin crust. You can skip the second brown and serve step. Don't overbake rolls as they won't stay fresh for sandwiches as long.
Freeze brown and serve rolls or large ciabatta sandwich rolls
- Wrap the buns you will use later for heat and serve rolls as soon as they cool to room temperature. I like to use a double layer of compostable cling wrap.
- Freeze right away and store frozen ciabatta buns for up to two months.
Bake brown and serve rolls from freezer
- You can bake your brown and serve rolls in either a toaster oven or a conventional oven. Whichever you choose, preheat the oven to 450 degrees before baking the bread.
- Unwrap frozen bread and place it directly on the middle rack of the toaster oven or conventional oven. Bake for 10 minutes or until fully golden and crusty.
Reheat large ciabatta buns
- Like smaller brown and serve ciabatta buns, they can be heated straight from the freezer without thawing. Place one at a time in a plastic bag and heat in a microwave for 45-60 seconds. They'll come out soft, chewy, and easy to slice for sandwiches.
Serve
- Brown and serve rolls - Serve brown dinner rolls wrapped in a tea towel inside a basket or serving bowl. Hot rolls will stay warm this way for up to 30 minutes.
- Large ciabatta buns - Cool freshly baked sandwich rolls to room temperature and store them in an air-tight bag. When you're ready to eat them, slice them in half with a large serrated knife. They are best eaten in one to two days.

"Share Your Thoughts"